Learning how to edit a footer in WordPress can seem a little tricky at first. Depending on the theme you use for your website, the functionality of your footer might vary.
Fortunately, there are a number of different ways to customize your footer, so you can showcase more information, improve your website’s branding, or simply make your online presence more unique. Once you’ve learned how to edit your footer, you can use it for everything from displaying trust signals, to make your ecommerce site more credible, to listing social media icons.
You could even use your footer to direct people straight to your “Terms and Conditions” pages, or draw attention to your privacy and security measures you use on your site.
Here’s everything you need to know about your WordPress footer, and how you can edit it.
What is a WordPress Footer?
The footer on a WordPress website is the section at the very bottom of your website pages, which appears after the main content area. It should appear on every WordPress website page and post.
At a glance, a footer might not seem particularly important. Many of your customers are likely to find the information they need on your website before they hit the very bottom of the page, so the footer is frequently overlooked. However, it can offer value if you use it correctly.
Take a look at the footer on the Inboundblogging.com website, for instance:

If you scroll to the bottom of our pages, you’ll see a selection of links to help you navigate to different parts of the website, without having to scroll back up to the top of the page. There are also a series of social buttons you can click on to find our brand on your favorite platformchannel.
With a few simple changes to our footer, we’ve managed to simultaneously improve user experience and improve our chances of drawing new followers to our social media accounts.
Why is it a Good Idea to Edit The Footer in WordPress?
Simply put, while not everyone on your website will see your footer, it’s still a valuable asset and a crucial part of your online presence. Your footer appears on every page of your WordPress website, which means it’s an excellent opportunity to grab attention.
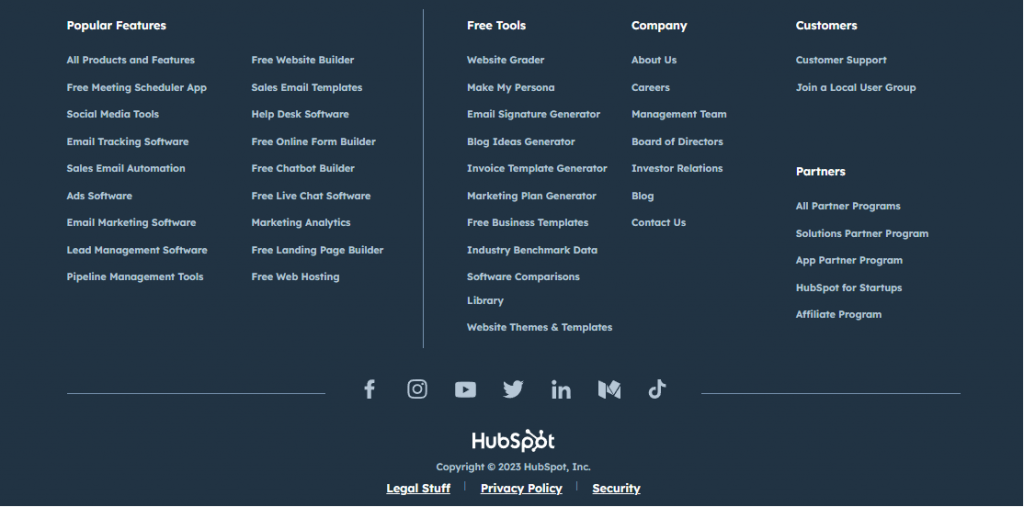
You can use your footer to provide links to crucial pages on your site. This way, people will be more likely to stay on your website and interact with your content for longer. The more time people spend on your website, the higher your chances are of converting them into paying customers. Some sites, like HubSpot, provide access to a huge range of different links in their footer:
Footers can also be a fantastic tool for expanding your reach. You can attract customers to your social media channels, and therefore improve your credibility on different platforms. You can use footers to show trust and security signals, which can enhance your reputation and increase sales.
A footer even gives you an opportunity to strengthen your brand image, by showcasing your business name and logo, just like you would in your website header. Some companies even add snippets of information about their brand to their footer.
Simply put, your footer is a precious piece of real estate on your website. It just makes sense to take advantage of the asset, rather than leaving it blank.
Different Ways to Edit the Footer in WordPress
The good news for business leaders and bloggers is that most website builders come with tools which allow you to edit all of the segments of your site, including your footer. WordPress is no exception.
However, because there are so many different themes available for WordPress, not every editing strategy works for every theme.
The method you use from the options outlined below will typically depend on what kind of theme you’re using, and what kind of technical knowledge you have.
How to Edit your Footer with the WordPress Theme Customizer
Probably the easiest way to edit your WordPress footer, is to use the Theme Customizer system. This is an option included with a range of WordPress themes which allows you to customize your site’s appearance. To access the Customizer, sign into your WordPress dashboard, and click on the “Appearance” section, followed by “Themes”.
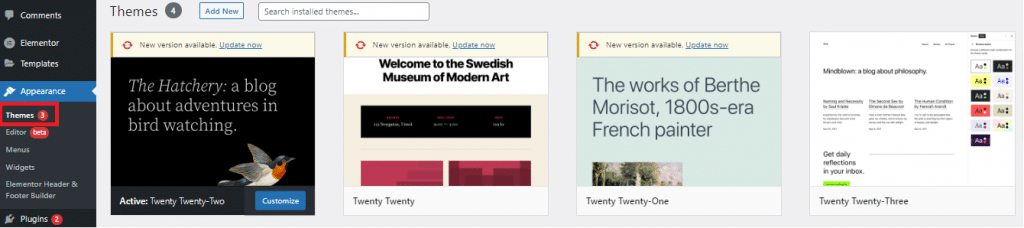
You’ll arrive on a page which shows you all of your saved themes, and your currently active theme. Your Active theme should have a button on it labeled “Customize”. Click this, and you’ll be taken to the visual editor page, featuring your current theme.
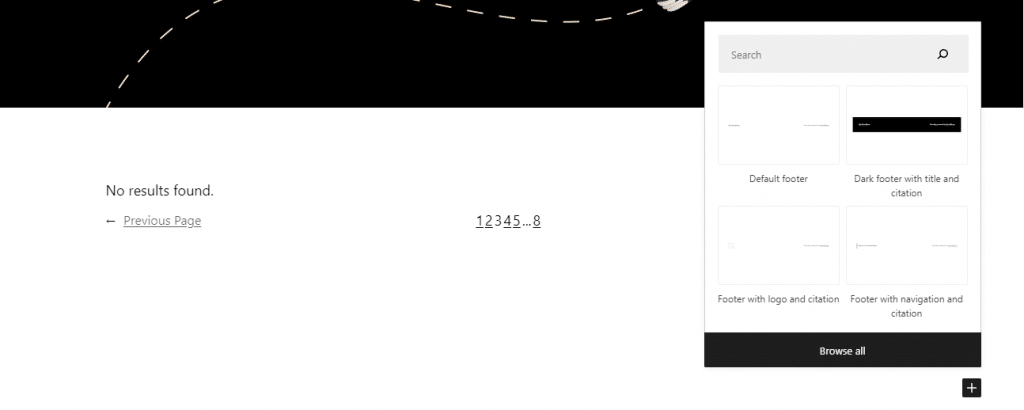
Scroll to the bottom of the page and click the “+” icon, and you’ll see a range of footer options you can add to your site. Click on a footer option if you don’t have one already.
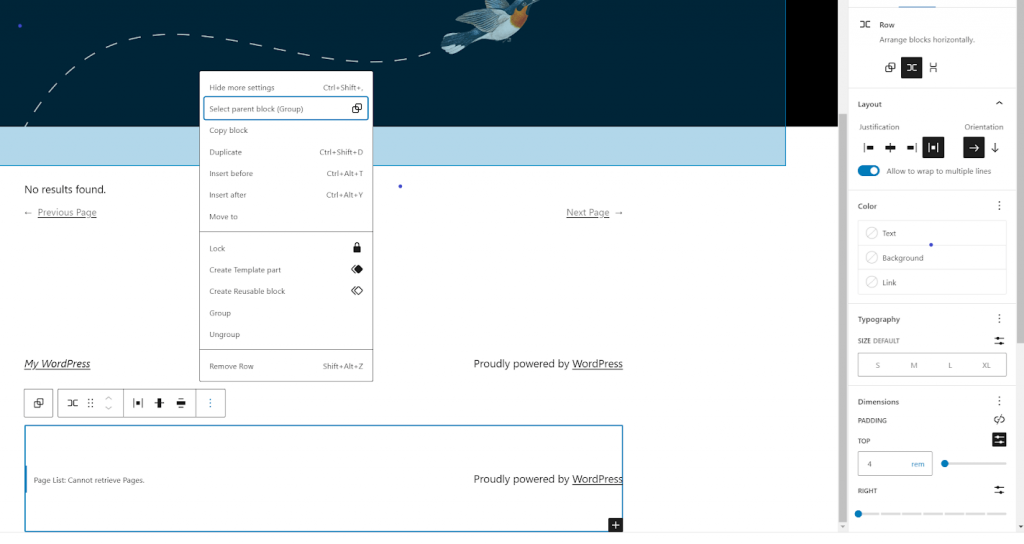
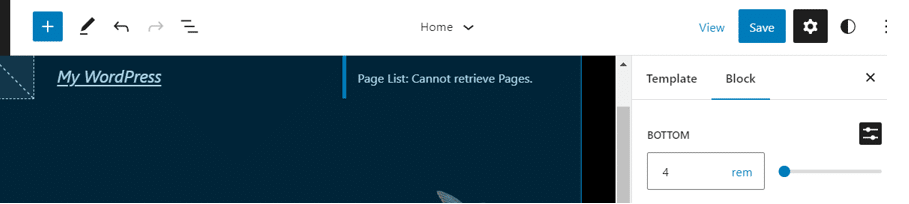
Click on the Footer block, and select “Show More Settings” to bring up the block editing panel. This will give you a range of editing options for your footer. You’ll be able to add links, and change the color of the links in your footer. You can also add a custom background and text, select different types of typography, and add borders to your footer.
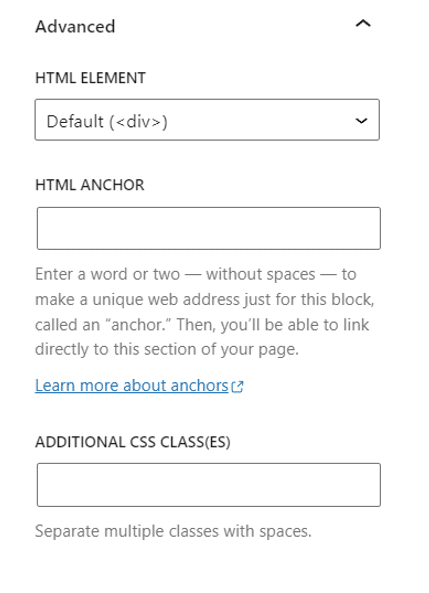
Clicking on the “Advanced” tab in your menu will allow you to add HTML elements with specific links to your footer. This will allow you to link out to other pages on your website using anchors. For instance, you could have a link for your Home page, Product page or Blog page.
After you’ve made your desired changes, you can click the “View” button to preview your website, or click “Save” to publish the changes.
How to Add Widgets to your WordPress Footer
Another way to customize your WordPress footer, and enhance its functionality, is to add widgets directly to the footer. There are a few ways to do this, depending on the WordPress theme you’re using. If you have access to Widgets on WordPress, you’ll be able to find them in the “Appearance” Section of your website:

Clicking into “Widgets” will show you multiple footer sections. These are blocks you can edit within your site’s footer. Click on one of the sections to open it.
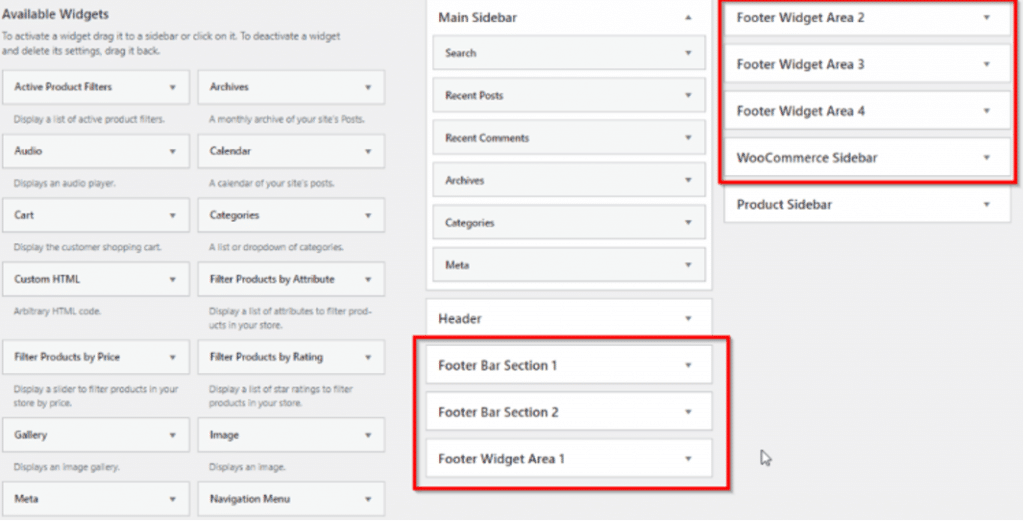
When you open a footer section, you’ll see different widgets you can drag and drop from the left side of the page, into the different sections of your footer bars. Drag and drop “Custom HTML” into the footer bar section 1, and you’ll be able to copy any script or code you want to use in your footer here.
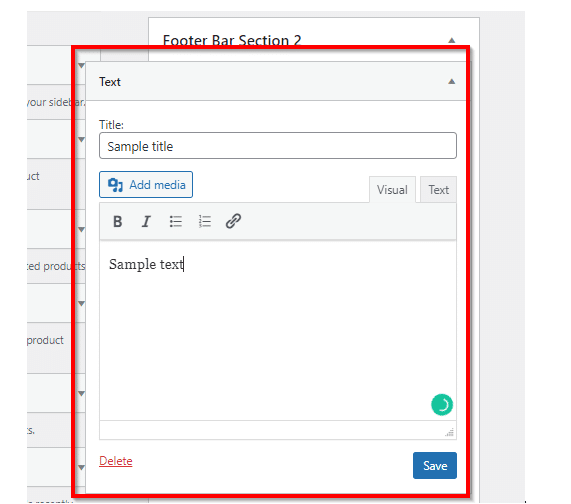
Alternatively, you can simply drag and drop a text section into your footer bar. Usually, you’ll place this in the “Footer Bar Section 2” area. Here, you can include any custom text at the bottom of your web pages, such as “Powered by InboundBlogging.com.”
How to Add a Menu to a WordPress Footer
Many companies add a menu to their WordPress footer (we’ve done this on Inbound Blogging too). It’s a good option if you want to prevent your customers from having to scroll all the way back up to the top of the page after they’ve finished reading a blog or checking out a piece of content.
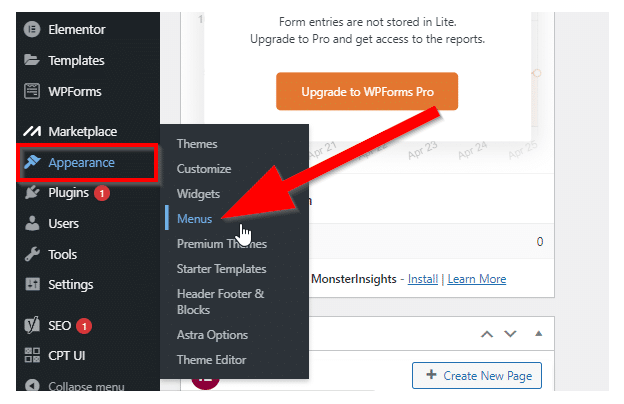
To add a menu to your WordPress footer, log into your site as an admin, and click on “Appearance”, then “Menus”:
Next, click on “Create a new Menu”, in the “Edit Menus” tab. This should take you to a page where you can enter a name for your new menu. It’s worth giving your footer menu an identifiable name so you can find it easily again later.
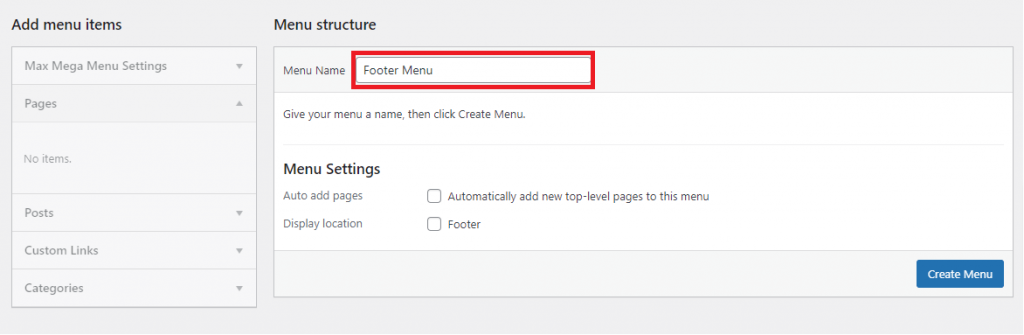
In the “Menu Settings” section, you’ll see the option to choose “Footer Menu” as a display location for your new menu. Tap on this and click on “Create Menu”. Once you’ve created your menu, you’ll be able to choose which links appear in it.
You can choose from a range of pages on your WordPress site, but we recommend only adding the most relevant, such as your Contact page or Shop page. Check all the pages you want to add, then click “Add to Menu”.
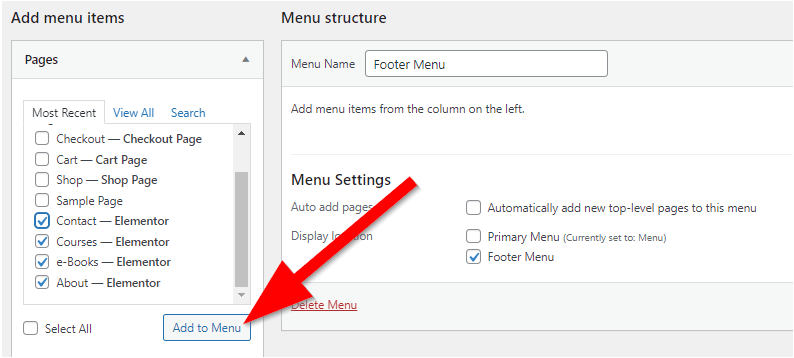
Once your pages have been added to your menu, you’ll also be able to drag and drop them into any order you like. Click “Save Menu” to save your new menu to your WordPress site footer.
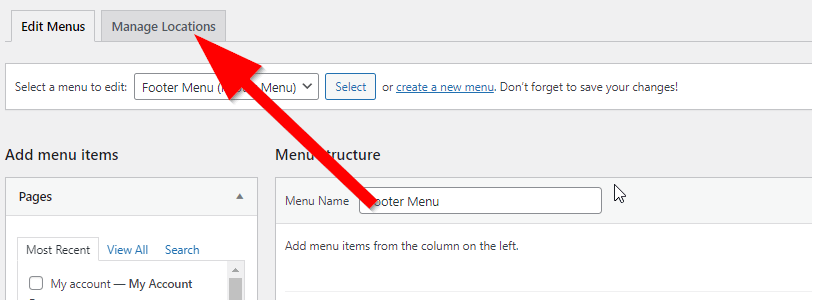
Notably, you can also add an existing menu on your site to your footer, by clicking on the “Manage Locations” tab on the Menu page.
Click the dropdown list next to “Footer Menu”, and choose the menu you want to use, then click on “Save Changes”. You can then place your menu in your footer by going back into the Widgets section of your WordPress site (Under Appearance”, and clicking on the Footer Widget area where you want to place your menu.
Next, simply drag and drop your “Navigation Menu” widget into the footer widget area.

Select the menu you want to show on your footer and hit “Save”.
How to Add HTML Code to Your Footer
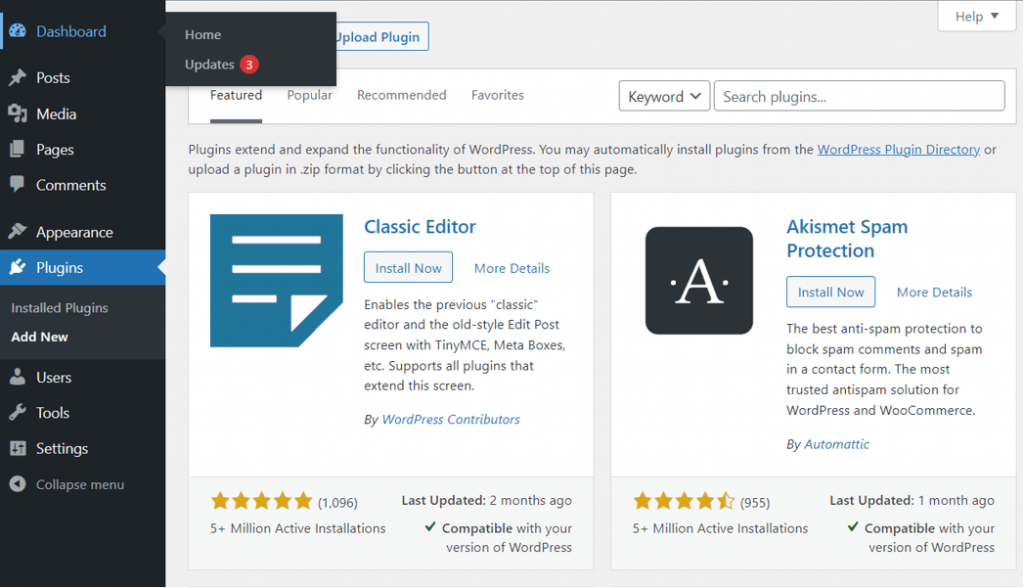
If you want to add HTML code, such as tracking scripts for Google Analytics into your footer, the easiest way to do this is with a plugin. We recommend using the “Insert Headers and Footers” plugin. You can find this by typing “Headers and Footers” into the search bar after clicking on “Plugins”, then “Add New” on your WordPress admin page:
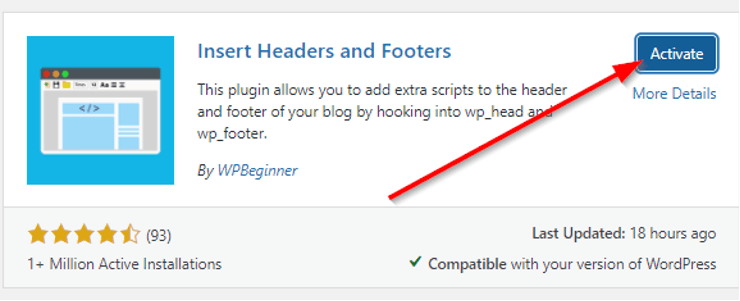
Install the plugin, then click “Activate”.
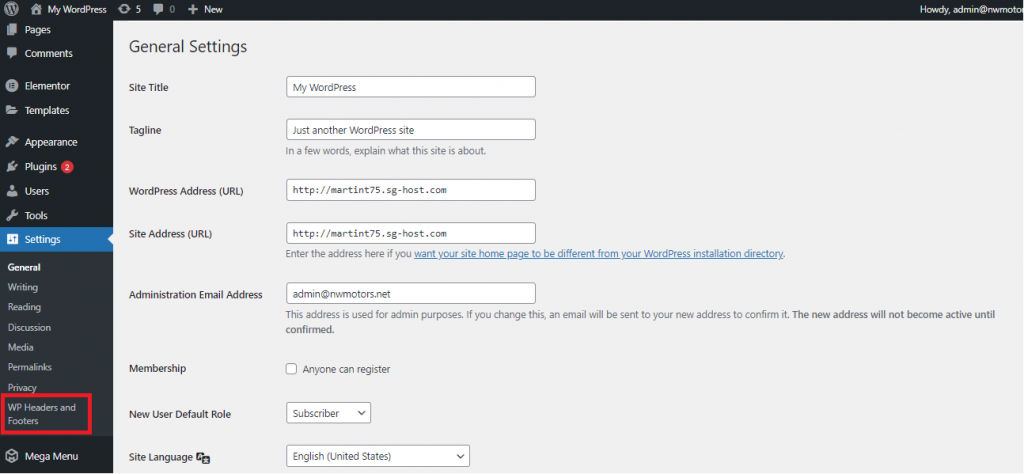
Once the plugin has been activated, you should be able to use it by clicking on the “Settings” tab on your WordPress Site.
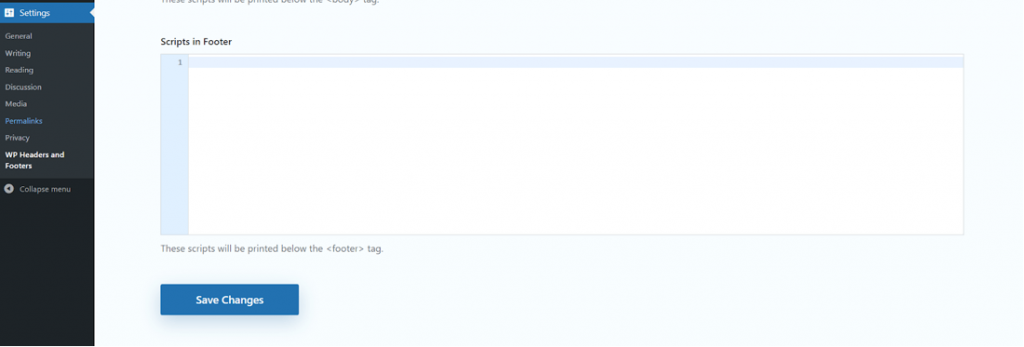
On the plugin page, scroll down to “Scripts in Footer”, and you’ll be able to copy/paste HTML code directly into the box provided. Remember to hit “Save” to preserve your changes.
How to Remove “Powered by WordPress” from your Footer
One of the easiest ways to make your site look more professional, without making drastic changes to your footer, is to remove the “Powered by WordPress” text. You can either remove this text completely, or change the name “WordPress” to your own domain name.
You’ll be able to do this using the “Customizer” service on WordPress if your theme allows it. However, if you don’t have access to the Customizer option, you’ll have to edit the PHP file for your site’s footer instead.
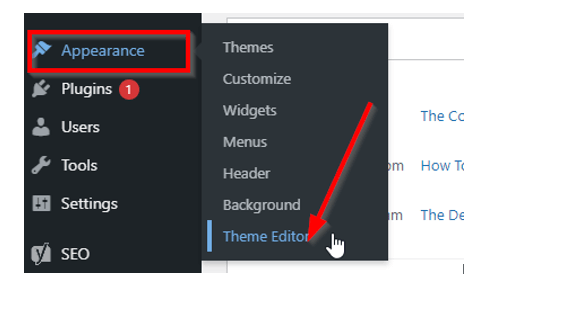
To do this, you’ll need to sign into your WordPress dashboard, click on “Themes”, then “Theme Editor”.
In the “Themes Files” list that appears on the right of your screen, scroll down until you see the “Theme Footer” option. Click on this.

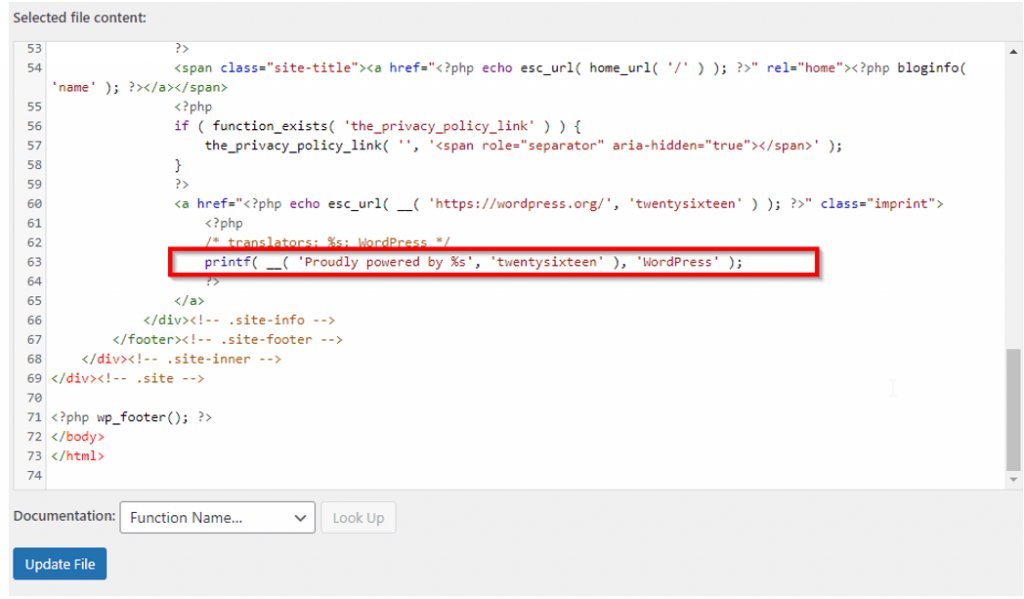
Before you edit the code directly, we’d recommend using CTRL+A and CTRL+C to copy the code and save it somewhere. This will ensure you still have an untouched code backup if something goes wrong. After you’ve backed up your code, go back to the Footer.php window, and search for “Powered by”.
Select and remove the highlighted “Powered by” line from your code, then click “Update File”:
How to Create a Custom WordPress Footer with Elementor
If you want to create a custom WordPress footer from scratch, but you don’t want to experiment with code, using a drag-and-drop editing tool, like Elementor could be a good option. Elementor also has its own dedicated template solution for Headers, Footers and Blocks.
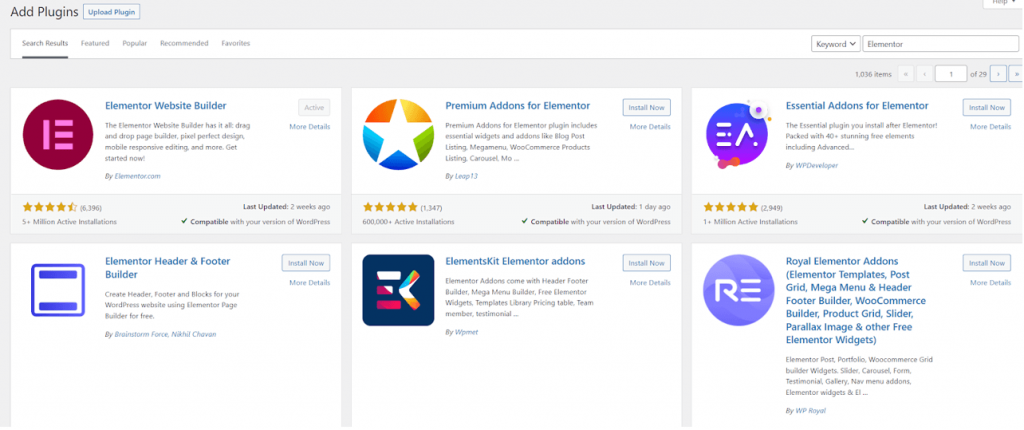
Add the two plugins to your WordPress website, by searching for “Elementor” in your plugins page, then click on “Install Now” and “Activate”. When both of your plugins are active, go to the “Appearance” section of your site and click on “Elementor Header & Footer Builder”.
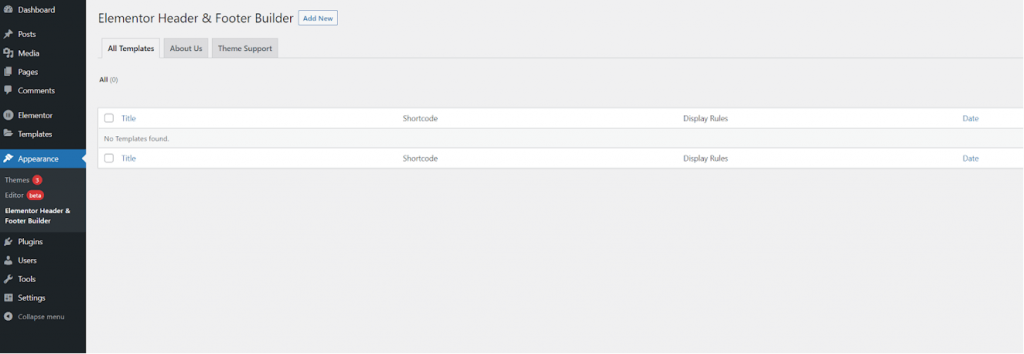
From here, click on “Add New”, and you’ll be able to choose the type of template you want to design. Choose “Footer”. You can also decide where you want your footer to display on your website.
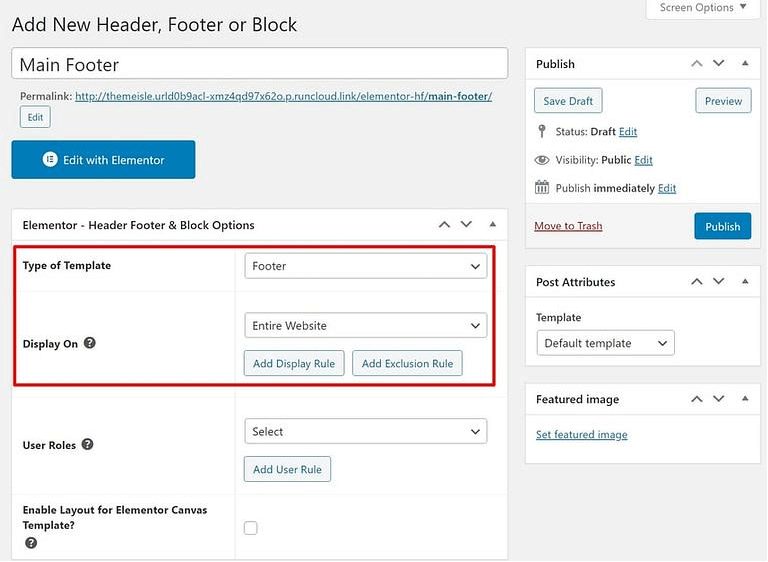
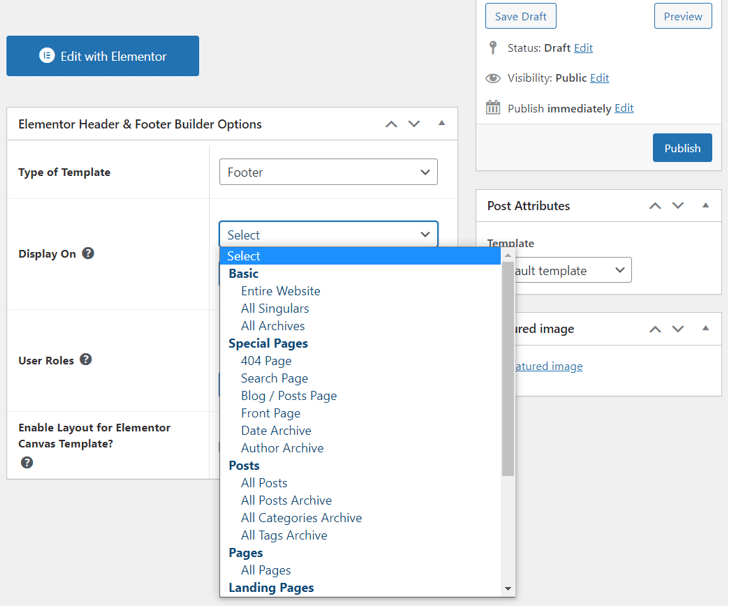
Click on the dropdown menu next to “Display On” if you want to customize which pages your footer appears on. You can choose to show your footer only on your landing pages, or specifically on pages within your ecommerce website, for instance:
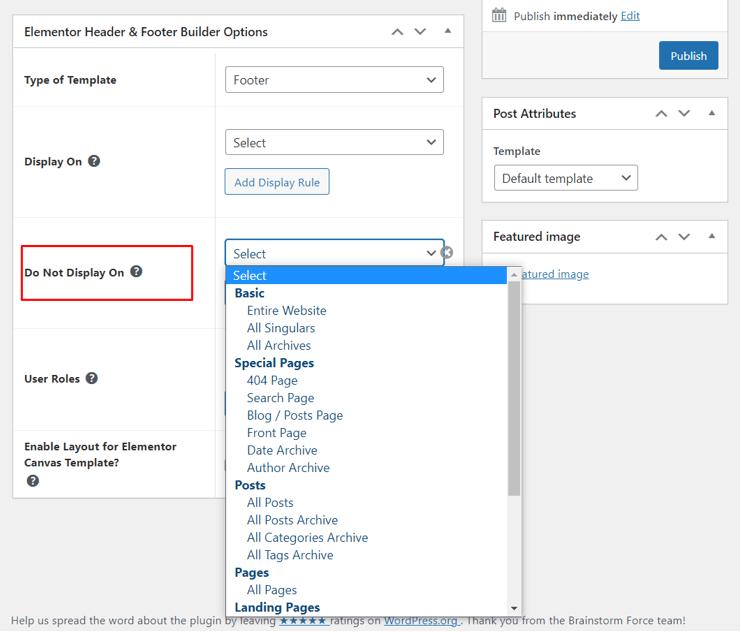
You can also click on the “Add Exclusion rule” option to select which pages you specifically don’t want your footer to show on. For instance, if you wanted to make sure your customers weren’t distracted by extra menus and components on a footer when they’re visiting your landing pages, you could exclude your footer from all landing pages:
After you’ve chosen where you want your footer to display, you can add specific user rules. For instance, you can decide to have your footer only show to people who are logged into a membership account on your website. Once you’ve dealt with all of these settings, click on “Edit with Elementor” to start building out the components of your new footer.
This will take you to a visual drag-and-drop interface, where you can customize every part of your footer. You can add images, videos, dividers, buttons, text, headings, Google Maps, Icons and more. There’s even a dedicated “Copyright” widget.
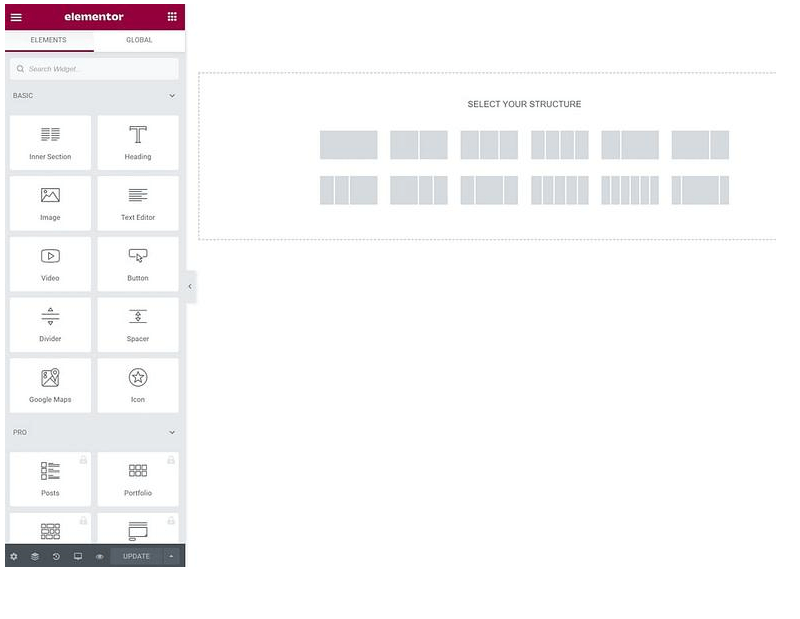
Click on the component you want to add to your footer and drag it into your chosen space. You can also adjust your structure using this feature too. For instance, you can organize your menu into four different sections, or show a menu on one side and a feature image on the other.
It’s worth mentioning that some features are only available to users of Elementor Pro. For instance, you can’t add media carousels and flipboxes unless you have a premium account.
Editing the Footer on your WordPress Website
Learning how to edit the footer on your WordPress website might seem like a headache, but it can be a lot more straightforward than you’d first think. We’d definitely recommend considering a plugin application to help you with the process if you don’t have a lot of coding knowledge, or you’re not comfortable with HTML. Tools like Elementor allow you to adjust all of the different parts of your website easily, without having to worry about making coding mistakes.
Once you’ve edited your footer, keep an eye on how it influences the experiences your users have on your website. Watch your analytics to see whether your bounce rate drops, or whether people spend more time on your pages than usual. You might be surprised by the impact a good footer experience can have.
You might also like:
")


Article by
Nikola Baldikov