Playback speed:
Learning how to create a WordPress dropdown menu is an excellent way to improve the user experience on your website. To create a successful site, you need to ensure your customers can quickly and easily navigate between pages. A drop-down menu can help with this, especially if you have a particularly large number of resources on your site.
With a WordPress dropdown menu, you don’t need to create a cluttered header bar or sidebar for site navigation. Instead, you can allow your customers to simply expand the navigation menu for each section of your site, based on their specific interests.
Today, we’re going to explain how to make a dropdown menu in WordPress, using two of the simplest methods.
How to Design a Dropdown Menu in WordPress with Native Functionality
Perhaps the easiest way to build a WordPress dropdown menu, is by using the core functionality already built into your chosen theme. Keep in mind, while most themes do allow for dropdown menu creation, there are some which don’t. It’s worth checking your theme’s specifications before getting started, to ensure you’re not wasting your time.
If your theme doesn’t support native dropdown menus, you can still add the feature, just skip ahead to the second method in this article. If your theme does support native dropdown menus, you’re already all set. Plus, you should be able to continue using the dropdown menu you create if you switch themes (provided your new theme also supports the feature).
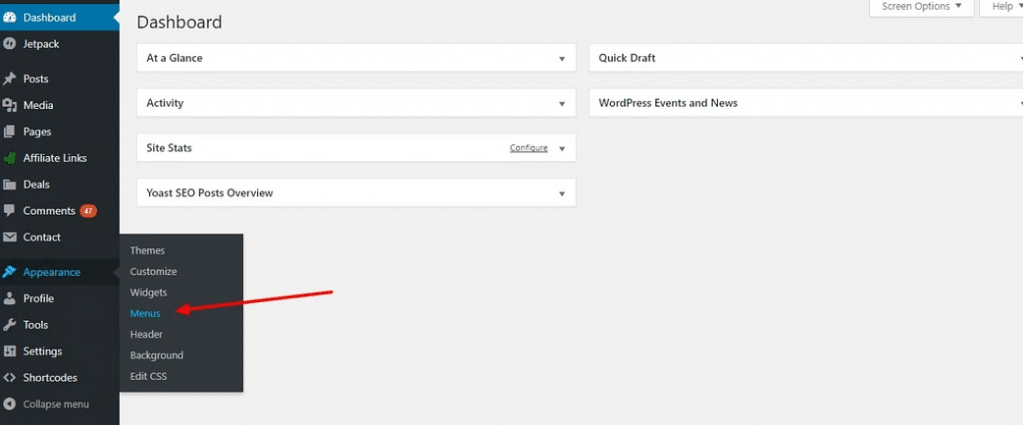
To begin, log into your WordPress admin dashboard and click on Appearance > Menus.
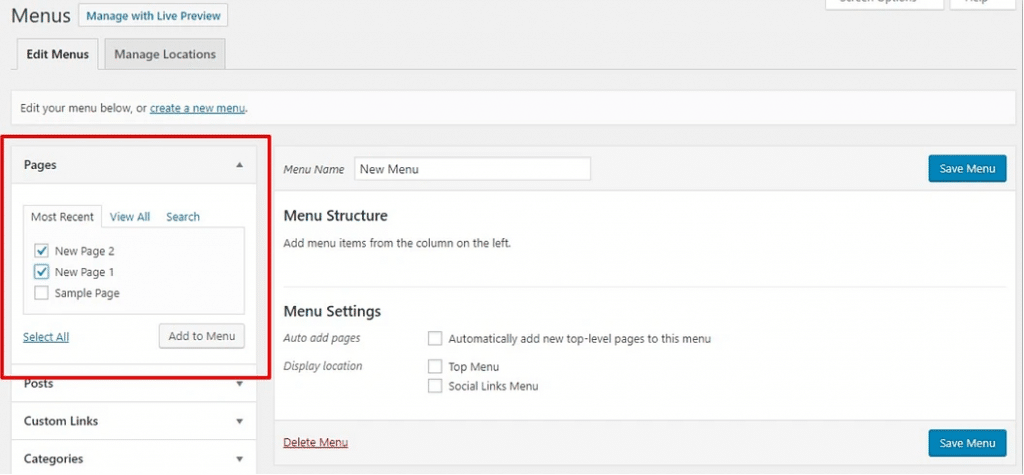
You may need to “Create a menu” to get started. If you don’t already have a menu, enter a name into the “Menu Name” box provided, and click the button “Create Menu”.

Next, add the links to your menu. You can use the sidebar section marked “Pages” to check which page you want to show up in your menu. Once you’ve selected the pages you want to add, just click the “Add to Menu” button.
You’ll also be able to arrange the menu items according to your preferred order. Simply drag and drop the items you want to appear in the dropdown menu to your ideal position. Click “Save Menu” when you’re happy with the order. Next, choose your menu location.
If you already have your navigation bar located in the header for your home page and other content, it’s usually a good idea to add the menu there. You can decide exactly where you want your menu to appear using the “Meu Settings” section.
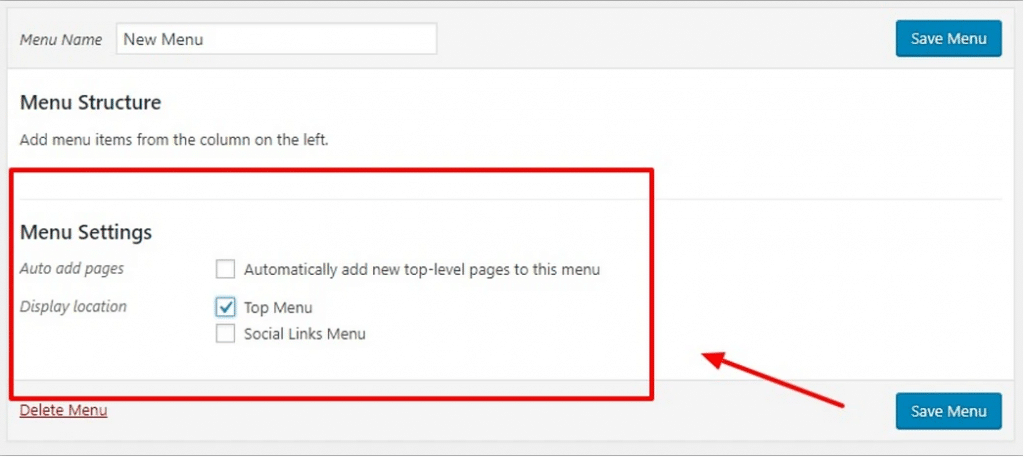
Keep in mind, you might see different Display locations based on the theme you’re using, and each section may be labelled differently. If you’re going to be creating a number of drop-down menus, it’s worth clicking the “Automatically Add” option, to automatically add any new pages you create to your menu. However, this can quickly become cluttered if you’re creating a lot of posts.
The ideal option is to use the “Manage with Live Preview” button. This takes you to your WordPress “Customizer” section, where you can actually see what your menus are going to look like on your website, according to your current theme.
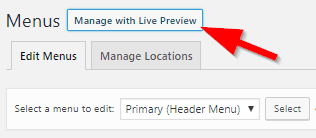
The Live Preview option allows you to drag and drop menu items to the dropdown lists you like, and change menu locations according to your specific needs.
How to Make a Dropdown Menu in WordPress with Plugins
If your chosen theme doesn’t support dropdown menus automatically, you can still add your own by using a plugin. Some of the best options include:
- Max Mega Menu: A free plugin which gives you more options for your menu editor
- Hero Menu: A customizable tool with responsive editing options
- UberMenu: An easy-to-use tool for control over your menu style and functionality
Let’s explore how the process works using the Max Mega Menu plugin.
This plugin simply adds the functionality to your WordPress website that allows you to create dropdown menus, but it won’t create menus for you. You’ll still need to do that part yourself.
Start by installing your plugin. Go to your WordPress dashboard, click on the “Plugins” tab in the sidebar, followed by “Add New”. Type the name of the plugin you want to add, then click on “Install” followed by “Activate”. Next, click on the “Mega Menu” tab that appears in your sidebar.
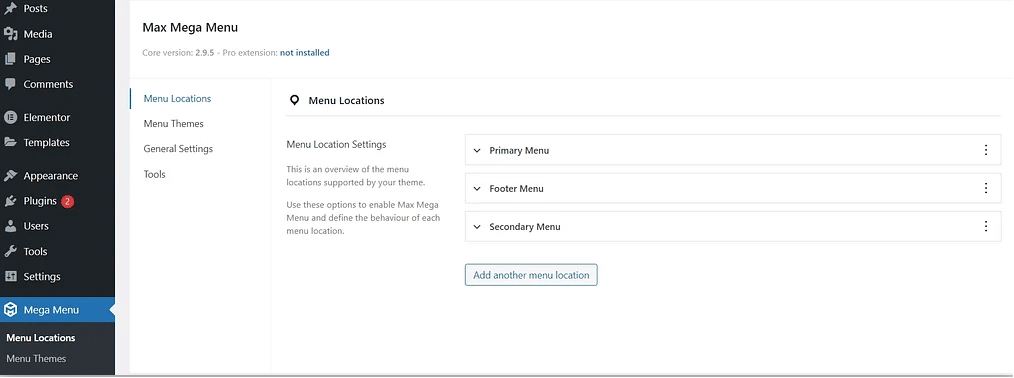
If you don’t have any menus on your website yet, you’ll need to create one using the method outlined above. Once you have your menu, click on the “Primary Menu” option in your plugin’s page. Check the box which enables dropdown for your menu.
You can enable dropdown menus for as many menus as you like, using the same method.
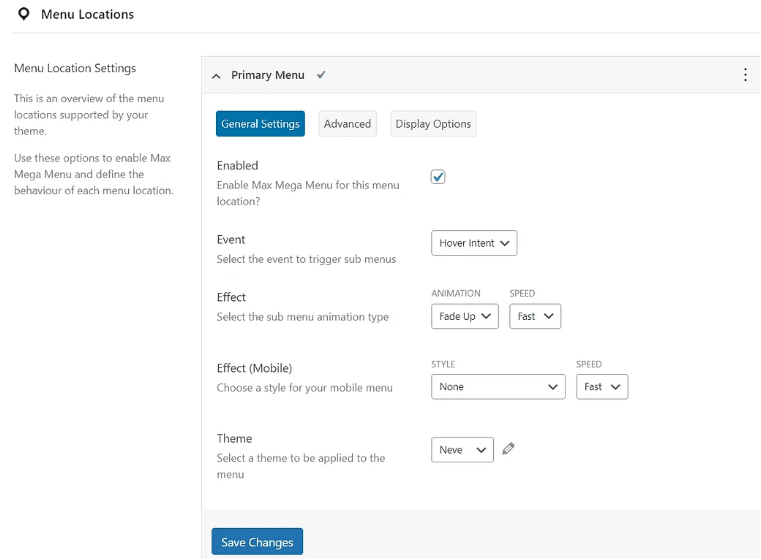
After the “dropdown” option is enabled, you’ll be able to choose the “trigger” which enables the sub menus. For instance, you can decide to have the sub-menu appear when someone clicks on a tab, or when someone hovers over your chosen menu. You’ll also be able to choose which animations accompany your drop-down menu for mobile and desktop users.
Finally, select your preferred “style” for your menu. You can stick with the default menu styling provided by the plugin, or you can allow the menu to adapt according to your theme. Click on the “Save Changes” option before you move on to the next step.
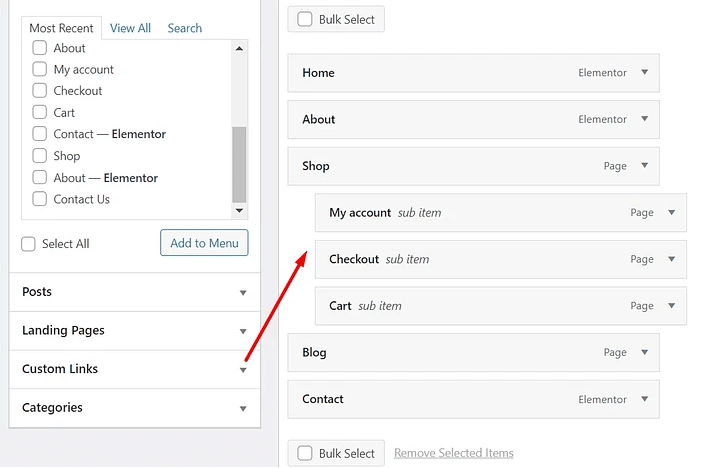
When you’re ready, go back to “Appearance” on your WordPress sidebar, and click on “Menus”. You’ll need to select the primary menu again, or the menu you enabled the dropdown option for in the “Select a Menu to Edit” section.

Once you’re ready, you’ll be able to drag any post, page, category and custom link into your menu, in the right-hand side of the page. All the menu items which appear within your chosen menu will display when a user clicks on or hovers over your menu, based on your trigger settings.
Tips for Using WordPress Dropdown Menus
Now you know how to set up WordPress dropdown menus, it’s important to make sure you’re using these tools correctly. The key thing to remember when creating dropdown menus for WordPress, is you should always be focused on delivering the best possible user experience for your target audience. With this in mind, always:
- Organise your menus carefully: The tabs in your menu should appear in a way that makes sense for your target audience. If you’re using the default option for WordPress dropdown menus, you should be able to arrange where you place your sub-menus, so they appear in the relevant sections. For instance, if you have a menu for clothing in your ecommerce store, you will include all of the clothing sections in this space, such as t-shirts and hoodies.
- Give your menus the right titles: Make sure your customers know which menus they need to click on to find certain content by titling your menus correctly. If you have a menu for your “Blog posts” or “News” you wouldn’t include your “About” page in this section. Some pages of a WordPress site shouldn’t have a dropdown menu at all. For instance, the “Contact Us” page should usually be a tab on its own.
- Don’t make drop-down menus too long: The longer and more complex your dropdown menu is, the more complicated it’s going to be to navigate. With this in mind, keep an eye on how lengthy your menus get. If your menu seems too complex, it might be worth creating some alternative menus to help break everything up.
Creating a Dropdown Menu on WordPress
Learning how to create a dropdown menu on WordPress doesn’t have to be as complicated as it seems. If you follow the instructions above, you should find that you’re able to rapidly create a wide variety of different menus with minimal effort. WordPress also allows you to easily customise these menus, so you can ensure they align with your brand.
Good luck creating the right dropdown menus for your needs!
You might also like:
")


Article by
Nikola Baldikov