Playback speed:
Learning how to edit a header in WordPress might seem like a complex concept, but it’s often a lot more straightforward than most people realise. After all, one of the reasons WordPress is among the most popular CMS (Content Management System) tools on the market, is its inherent flexibility.
On WordPress, you can create an entirely custom website, ideal for everything from blogging to selling physical products and services. However, it’s up to you to make sure your website stands out from the crowd, engages your audience and delivers opportunities for brand growth.
Editing components of your WordPress site, such as your header, footer and theme design, can help you to distinguish your brand identity, increase sales, and strengthen your reputation. Since your header is often the first thing your customers or fans see on any page within your website, it’s only logical to ensure you make the most of the section.
Here’s everything you need to know about editing a header in WordPress.
What is a WordPress Header?
Before we start discussing how to edit the header in WordPress, it’s worth ensuring you know precisely what a header is, and what it can do for your website.
On WordPress, the header is the element of your site that appears at the top of the page. Typically, this element will appear on all pages within your website, from your blog posts to product pages. It often includes a menu which users can leverage to navigate your site, a search bar for finding specific content and your brand logo.
On ecommerce stores, a header may also include a link to a cart page, where users can view all of the items they’ve added to their basket, ready to purchase. Regardless of which page a visitor clicks on, the header typically stays the same, offering a level of consistency throughout your site. Behind the scenes, a header is also a place where WordPress users can add:
- Google Analytics tracking codes
- Website verification codes
- Facebook Pixel codes
- Google Search console verification codes
- Images, videos, and logo files
How to Access the Header Configuration
The exact functionality you can achieve when learning how to editing a header in WordPress, will depends on the theme you’re using for your website. However, in most cases, you should be able to access your header from the same location.
To visit the header section of your website, log into the admin account for your WordPress site, and navigate to the Appearance tab. Click on the “Customise” option, when it appears.

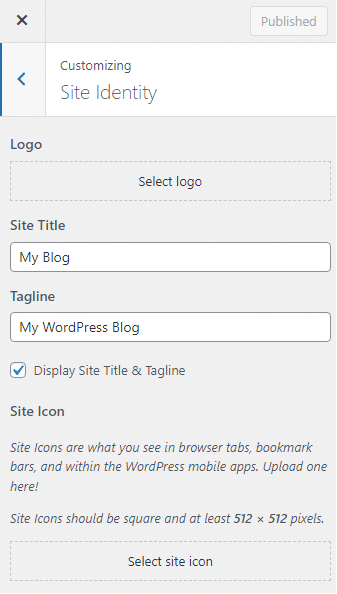
Select the Site Identity tab, and you’ll see a range of options for editing your site logo, title, tagline, icon and other factors. Within the Site Identity section, you should also see your current header, where you can add images, videos and other components.
How to Edit the Header in WordPress: 3 Methods
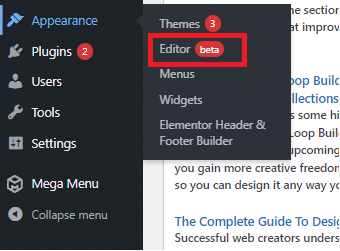
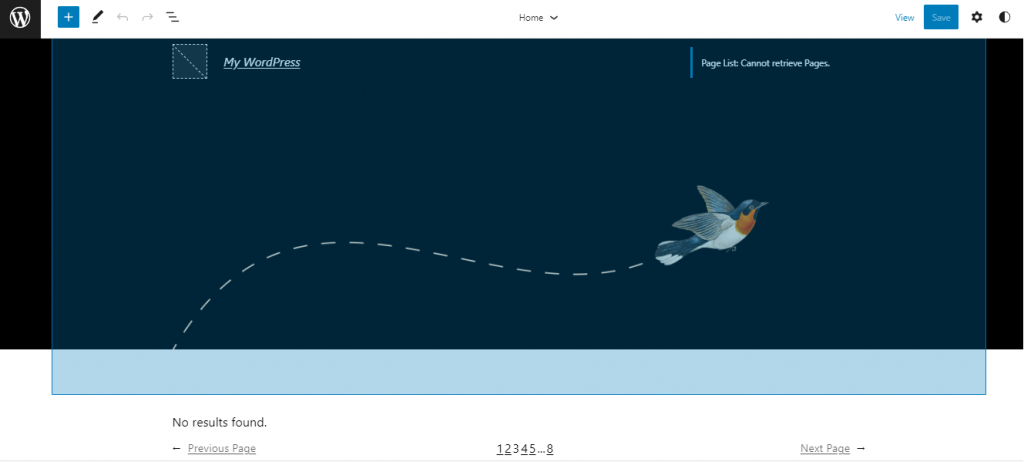
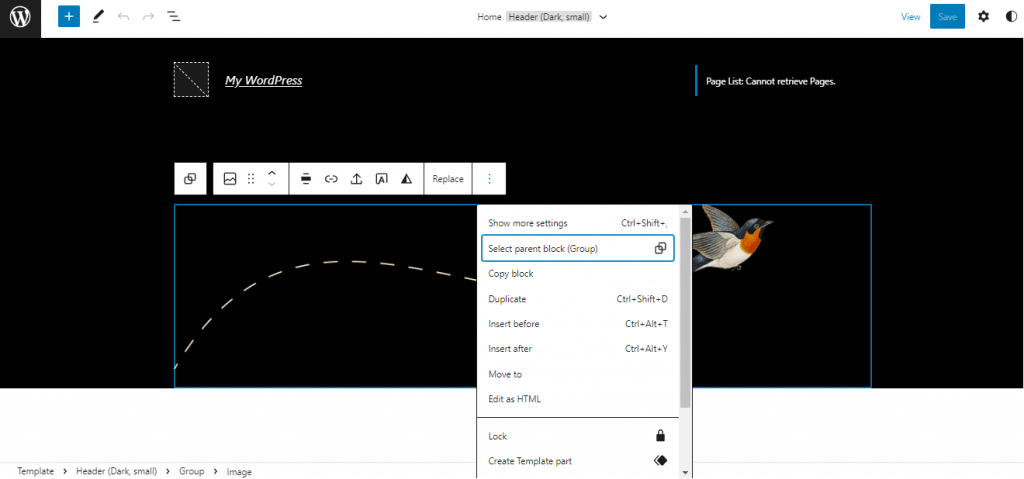
There are a handful of ways you can edit the header in your WordPress site. One option is to simply use the built-in site editor that comes with your theme, if applicable. You’ll be able to access the “Editor” within the Appearance section of your site.
Click on the area where you want to place your header image, and click on the +Block icon to insert a new block. You’ll be able to upload cover images straight from your computer.
Some themes also come with a “Customizer” option, located in Appearance > Customize, which allows you to add your own header image directly.
Here are 3 other methods for editing your header in WordPress.
How to Edit the Header in WordPress using a Plugin
WordPress offers a range of plugins and add-on tools you can use for everything from improving SEO, to creating custom headers and sidebars. Plugins are helpful if you don’t have a lot of coding knowledge, as you can often use them to make simple changes without technical experience.
To begin, log into your WordPress backend, and click on the “Plugin” tab.
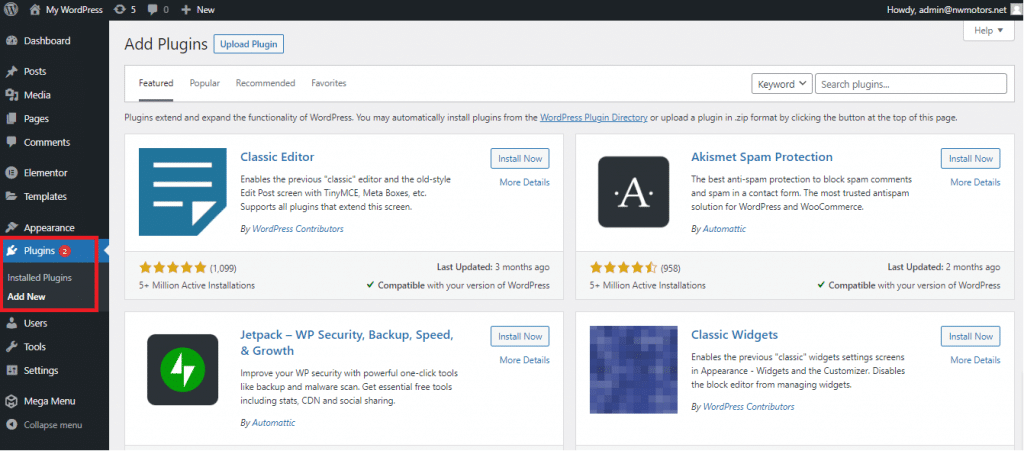
From here, you can click on the “Add New” option, and search for the header plugin you want to use. A good option is the “Insert Headers and Footers” plugin. However, you can simply search for the word “header” to find a range of different options.
Click the “Install Now” button next to the plugin you want to use, followed by “Activate”.
If you use the free “Insert Headers and Footers” plugin, you can configure your header by going into the “Settings” section of your site.
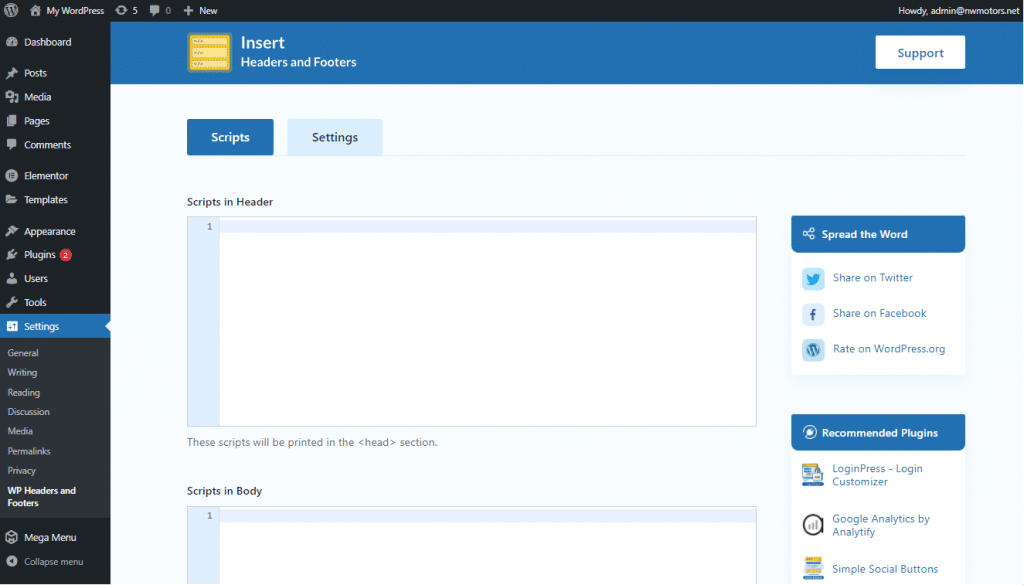
Here, you’ll find a page where you can edit three sections of your website: the footer, header and body. Adding a code to the header section will be visible before the </head> tag on your site. Once you’ve added the code for your header, including any images or videos you want to show, click “Save” to confirm your changes.
How to Edit a WordPress header using a theme PHP file
If you want to know how to edit header images in WordPress using slightly more advanced coding techniques, you can leverage the PHP file for your theme. This will prevent you from having to download plugins which could slow down your site.
To edit a WordPress header with a theme PHP file, you’ll need to access and modify the core files for your theme. It’s a good idea to create a child theme before you get started. This will ensure you can roll back any changes without coding issues.
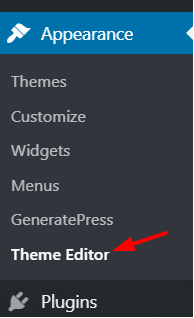
Once you have a child theme, log into your WordPress admin section, and click on the “Appearance” tab. Here, you’ll see the “Themes Editor” option.
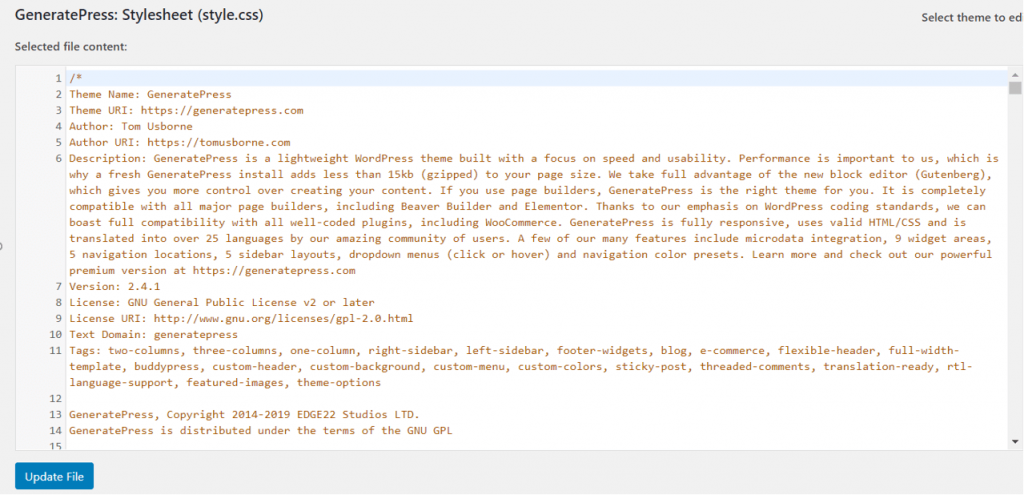
Click on this, and you’ll be taken to a page where you can edit the core files of your theme. The editor will showcase an existing theme style.css that looks like this:
On the right of the page, you’ll see a menu with all of the folders and files currently in your theme’s directory. You can search through this to find the Theme header:
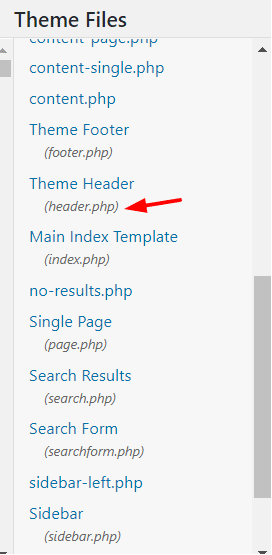
Select this file, and it will open in your editor. The exact appearance of the code will vary depending on your chosen theme. Look for the section between the <head> and </head> code snippets. Here, you’ll be able to add images and unique text with PHP code.
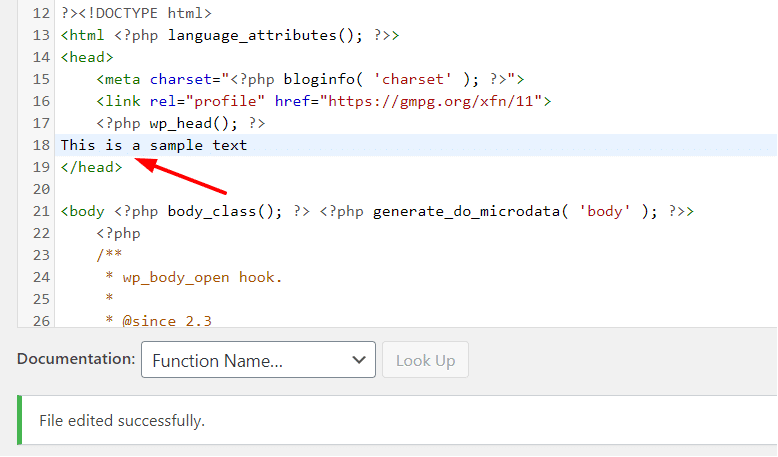
Once you’ve added your code, click “Update File” to save the changes. The system should tell you that the file has been edited successfully. You can then go to your site’s front-end to check everything is working as intended.
How to Edit a WordPress Header using an FTP Client
If you’re struggling with the WordPress theme editor, you can use an FTP client to help you. There are plenty of options available, including FileZilla, WinSCP and Forklift. For this example, we’ll be looking at FileZilla, as it’s often the most commonly chosen FTP client available.
To connect the FTP to your server, you’ll need an account, which you should be able to create using cPanel within your hosting environment. With the right username, hostname and password, connect the FTP client with your server.
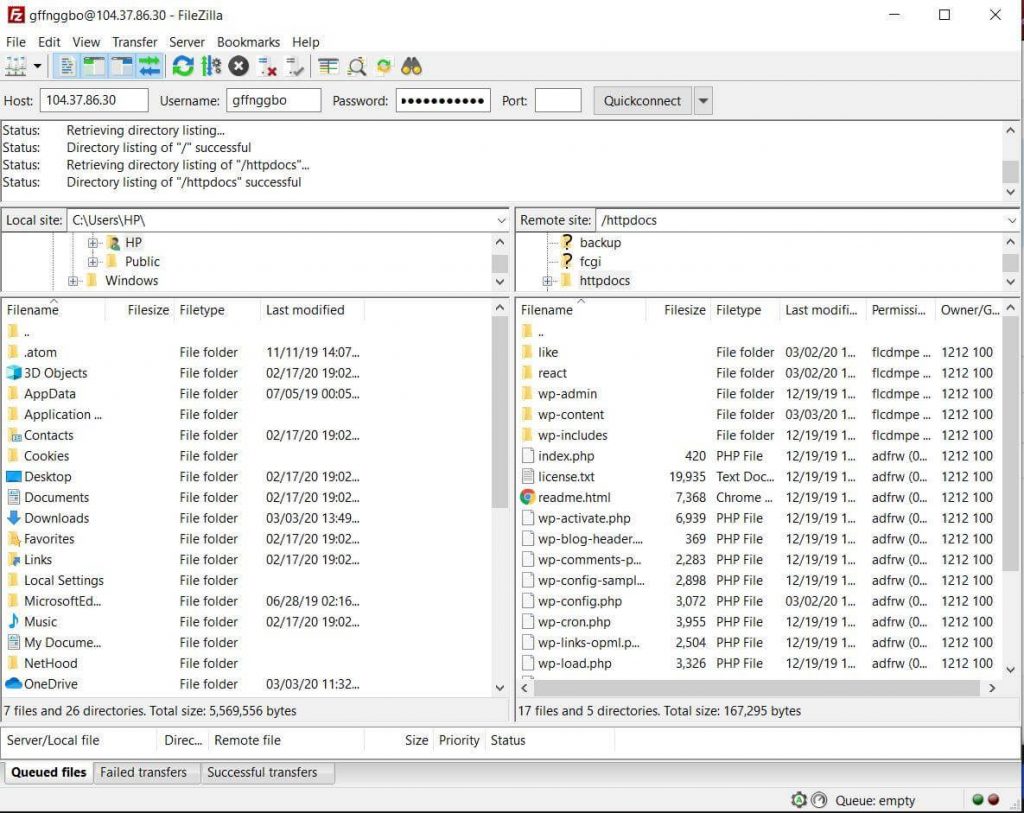
On the right side of the page, you should see server storage, while the left side shows your local storage. To edit your header file, go into your theme’s directory within the server section. You can find this by searching for /wp-content/themes/theme-name/.
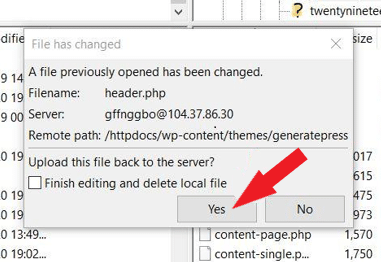
Within your theme file, you should see a header.php file. Right-click on this element, and choose your preferred editing option (such as Notepad). Here, you can make changes before the </head> tag to adjust your header’s appearance. Make sure you save the file and upload it back to your server when you’re finished.
Keep in mind, there is a potential drawback with this method. Once you change the theme files, you’ll lose previous customizations. This could mean that you’ll need to work on your files individually using your FTP client every time you want to update your WordPress pages.
How to Add Custom Header Images to WordPress?
Learning how to edit the header in WordPress will allow you to add a range of components to the top of your website pages. You can add custom text, videos and images. Let’s look at how you can implement your own image into your WordPress header.
Notably, before you start making customizations, it’s worth ensuring your theme of choice allows you to implement custom images.
From your dashboard in WordPress, click on Appearance, and you should see either the “Editor” option to upload images using the cover block tool, or the “Customize” option.
If you have access to the site “Editor”, click on this option and click on the location where you’d like to place your header image. Use your Block inserter to add your new image.
You should be able to upload images directly from your computer, or click on Select Media if you want to use an existing image already added to your site.
If you have the Customizer option, click on this tab, and look for the Header Image option. If you can’t find this tab, your theme may not support custom header images.
Click on “Add New Image”, then choose the picture you want either from your computer or your existing media library.
How to Choose the Right Image for Your WordPress Header
When adding an image to your WordPress header, it’s best to stick to .jpeg, .png or .gif files. The right size for the image will depend on how your site is laid out. It’s worth experimenting with a few different images to determine what works best for you.
Make sure you:
- Pick the right aspect ratio: A header image should take up most of the width of your site. Uploading an image with 16:9 aspect ratio is usually a safe bet.
- Avoid text: If you’re concerned an image with text will be obscured or difficult to read on mobile screens, add a photograph without text. You can add text on top of the image in the cover block segment of the editor.
- Get the loading time right: If it takes a while for an image to load on your WordPress header, this could be a sign that the file size is too large. You may need to compress the image.
- Choose a good resolution: Make sure the resolution is high to avoid any pixelation or blurriness in your website header.
How to Delete a Header Image
If you want to remove an existing image from your website, all you need to do is click on the “Hide image” button within the Customizer.
Alternatively, you can go into the Appearance section of your site, then click on Header, and remove the image you’ve uploaded. Remember to “Save” the changes you make to your site with the button at the bottom of the page when you’re done customizing.
What Can You Add to Your WordPress Header?
What you choose to include in your WordPress header is entirely up to you. Some people use their headers to instantly capture audience attention with videos and images. However, it’s worth making sure your chosen theme can support this first. Other options include:
- Site logo: You should always include the logo for your business or website on your WordPress header. This will help to boost brand awareness and strengthen your reputation online. Make sure the image is always high quality.
- Site menu: Your header should also include navigational features which allow users to navigate the pages on your site easily. Consider adding pages with sub-menus if you have a number of different site elements, such as a store or blog page.
- Search bar: A search bar will help users to find the content they need most on your website as quickly as possible. You can find plugins which make it simple to add search functionality to your site with a couple of clicks.
- Social icons: If you want to encourage customers and fans to follow you on social media, adding links to your social accounts or social media buttons is a good idea. This can also be a great way to generate social proof.
Finishing Thoughts
Ultimately, the header on your WordPress website is one of the most important tools you have when it comes to rapidly capturing audience attention and strengthening your brand image. The good news is that there are multiple ways you can edit your header using the steps outlined above.
If you’re a beginner in the WordPress world, using a plugin is likely your best bet, as it requires very little coding knowledge. However, if you’re not planning on changing your theme soon and you have some coding knowledge, you can dive straight into the code to make changes there instead.
You might also like:
")


Article by
Nikola Baldikov